15 Practical Steps to Draw a Perfect House Plan like a Architect
How to Draw project
house plan like a Architect
S T E P 1 - Size of Plot
Size of
plot is defined with its length & the breadth.
S T E P 2 - Setbacks
Setback
is defined as the open space in- between the compound wall & the wall of
the house which is being planned for.
S T E P 3 - Location & Width of the road
Location
& Width of the road will helps to assign a dedicated space for car entry,
parking & exit along with entrance gate.
S T E P 4 - North Direction
The direction
of north is the best to get an idea about the four cardinal directions (east,
west, and north, south) which inversely helps in understanding the local
climatic conditions throughout the year.
S T E P 5 - Climatic information
A house
needs to be responsive towards the climatic condition at any particular place If
taken into consideration it will help in taking more calculated design
initiatives for the house planning.
S T E P 6 - Do
R&D for sample Floor plan
A bit
of online research on house planning and design may not be such a bad idea if
it can give you some new perspective to look at modern house designs. Do check
sites which showcase floor plans & designs for your region. For India
S T E P 7 - Divide Plot in Grids
Draw
the plot boundary and then divide the plot in two equal half on both directions,
i.e. vertical and horizontal. Once done then draw similar lines about 2ft or
600mm apart from each other on both the directions. This way you have created an imaginary grid
line for developing your house plan further.
S T E P 8 - Make bubble Diagram (2/3 times)
Once
you have your drawing ready than list down your entire requirement for the
house. Do mention tentative area as the requirement maybe. See example
-Living
room
-Kitchen
-Dining,
etc
As listed above use these space on the drawing created
before of the plot for placing the rooms
as per your use and sense. Don’t worry too much in the beginning if certain
room / spaces don’t complement each other. This is your first draft & not
the final floor plan layout so don’t worry if it doesn’t look perfect. Have
some patience and it will evolve with time.
S T E P 9 - Draw the room layout with single line
Once the bubble diagrams is more in order of your requirement
then use a colored pen to firm up the lines to indicate walls (9 inch wall). Do
show door openings of around 3 ft minimum & window openings which can be
anything between 2fit to more. Use the
grid below as guidelines for taking the size of the window.
S T E P 10 - Draw with Double Line /thickness for Walls
In the next step place another tracing sheet on top of
the original drawing and now consider the walls to be of 9inch thickness and
convert those initial single lines to double wall lines.
S T E P 11 - Draw Doors
In a similar way as before indicate the door openings as
and where required. Do cretin changes in the floor plan as required for
accommodating entry to rooms / spaces.
S T E P 12 - Draw Window Openings
Following the same understanding as similar to doors
indicate the window openings on the drawing. Do keep it in mind that cross
ventilation is very important. Do check the wind direction for the plot also. Do
take rainfall, snowfall & other climatic information under consideration.
S T E P 13 - Use this Layout and draw them using an Online Software
Once you have done this process twice or thrice by using
a tracing sheet on top of the the initial floor plan layout then it’s time to
evolve & develop the same. The best way is to use any computer generated
drawing software which are widely available. Few of these house planning &
drawing software’s which we recommended are:
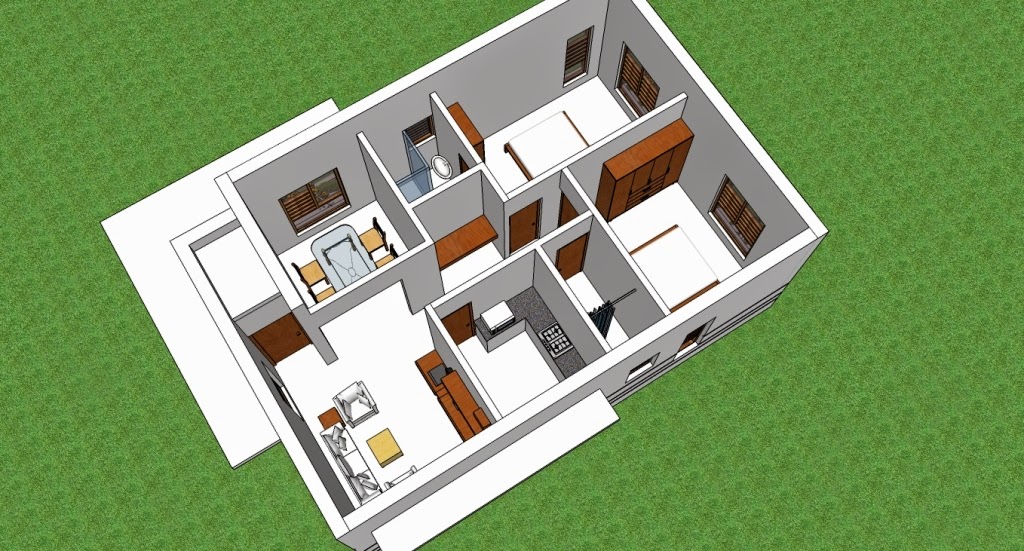
S T E P 14 - Place Furniture inside room to get a more realistic actual Idea about
Internal space
Once you have transferred the hand drawn layout on to any
of the above mentioned online home planning & drawing software, then it’s
time to make good use of their furniture library. It quite usual that you will
stumble upon an extensive set of furniture blocks of proper scale & size
which once placed on the floor plan layout gives a more realistic idea about the
floor plan. It may happen that certain furniture may look like that they
consume lot of space or they are too little for a large room. This process takes
time so do give yourself around 1or 2 hrs each day before you see something
more fruitful & a realistic looking floor plan. Drawing a good house floor
plan takes time so don’t be in a jiffy. Do remember that few hours of thought
today will give you more calculated quality of space for your everyday living
and for your investment for the House.
Also a good thinking
= A good house plan = Optimal use of your investment to build your house
S T E P 15 - Then render/colors the layout to get at
finish look of house
The same software will also help
you to colour the floor plans with the floor finish, carpet and other features
that you want to consider for the house. This will make the layout look more
presentable and readable.

Comments
Post a Comment
Thanks for sharing your comments